
With the Google Calendar, one can easily organize the different things on the website, manage the schedule and share events. Off lately, the Google Calenders are emerging as a powerful tool for managing the events and integrating them with the other Google-based services.
A Google calendar can easily be integrated into the WordPress site, and once done, it will start storing the events related to your business or website.
How To Add Google Calendar To Your Website?
In order to add the Google Calendar to your WordPress website, first, you need to download, install and activate the “Simple Calendar – Google Calendar” Plugin.
Here are the steps which you need to follow:
1. Login to your WordPress website, and from the left menu, click on Plugins. You will be shown a list, from which you should select “Add New”
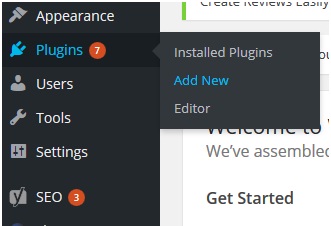
2. Now, in the search box type the name of the plugin which you want to install and press enter.

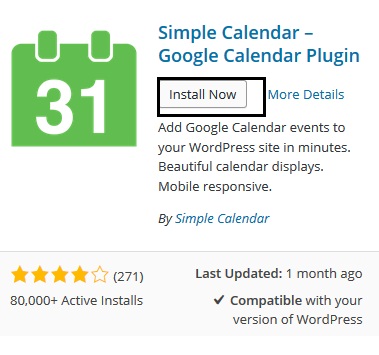
3. This will list the different plugins and the Calendar plugin which you are looking for is listed on the top. Click “Install Now”.
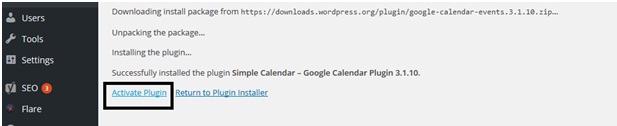
4. Now, it will list the installation steps, with the option to “Activate Plugin” in the end. Click it to activate the newly installed Google Calendar plugin.
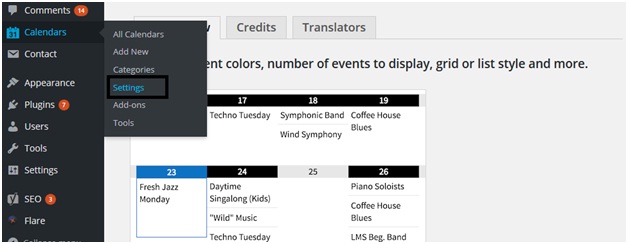
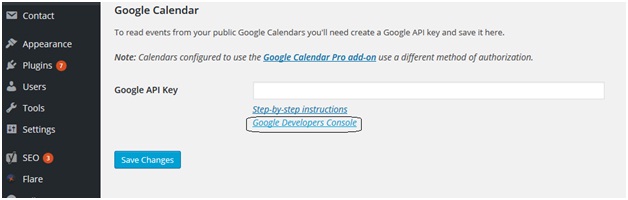
5. Once you activate the plugin, it would be listed in the left menu. Click “Calendar” from the left menu and then click “Settings” to set up the calendar on your website.
6. Now, the Google Calendar will ask for an API key. For generating the new key, click on the “Google Developers Console” link given in the bottom. It will redirect you to the Google Developers Console web page.
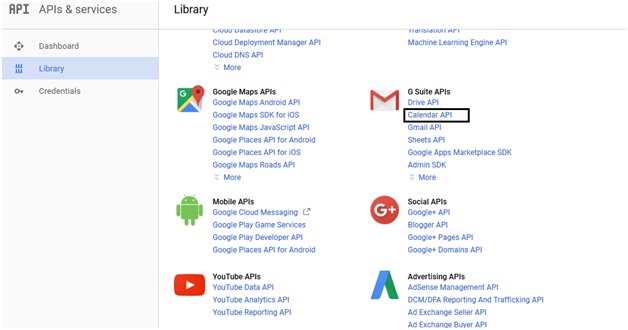
7. Out of all the developer tools and options listed, click on “Calendar API” link.
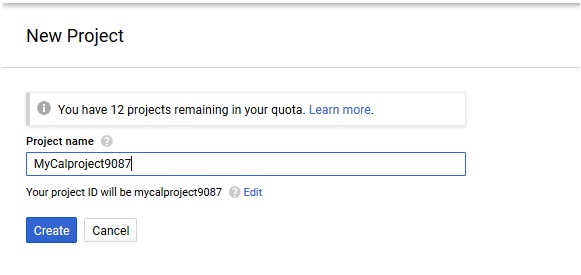
8. Now click on “Create Project”

9. You are now required to provide the project name, that will act as your “Calendar Project ID”. Write a unique name in the given box and then click “Create”.
10. Now, click “Enable” button to continue.
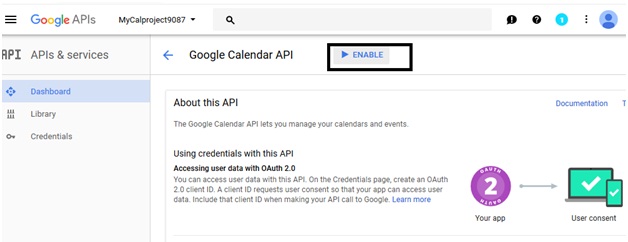
11. While the API for the calendar is now enabled, but, you also need to provide details about how you would access the API and which credentials you would like to use. So click on “Create Credentials” button.
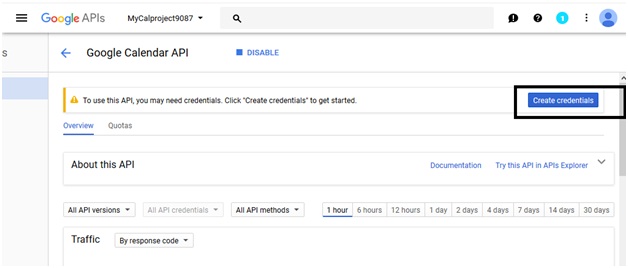
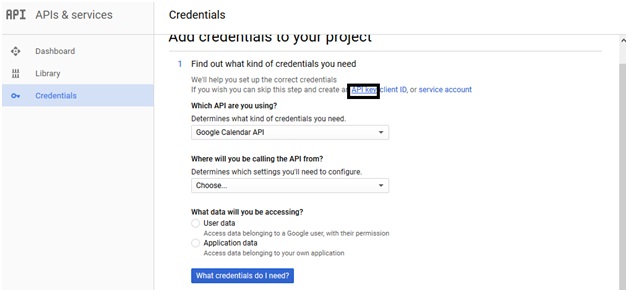
12. This will present you a list of options for adding the credentials to your project. Here, we want to use the API key as the credential for connecting the Google Calendar to the WordPress. So, click on the “API Key” link.
13. In the next step, you need to provide the information about where you want to use the API key. So, first provide a name for the key and then select the “Key Restriction” to restrict the usage of the key only to limited places. Select the option “IP Addresses” as you would be using it on the web server. It will also ask you to provide the list of IP addresses on which you would want to use the key. If you want you can leave the IP Addresses field blank.
14. After providing all the information, click on “Create”.
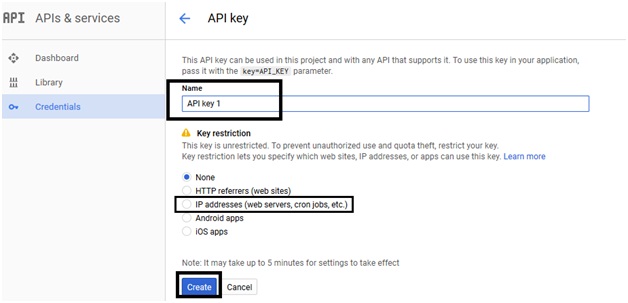
You have now successfully created the “API Key” to use with your Google Calendar on your WordPress website. From here, you can copy the key, and paste it into the settings page of the “Google Calendar” plugin. Save the changes before leaving the settings page.
Adding The Google Calendar To WordPress Website
Using the above-given process, you have successfully connected your WordPress website with the Google Calendars.
Now, to add a new calendar to your website, click “Calendars” from the left menu of the WordPress admin page, and click on “Add New”.
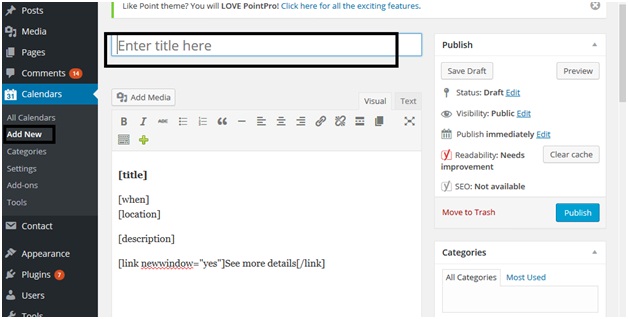
Enter the Title for the calendar in the given box, and you would see that some shortcodes are already added by the plugin to the main text area. Don’t edit these shortcodes and simply scroll down to the “Calendar Settings” box.
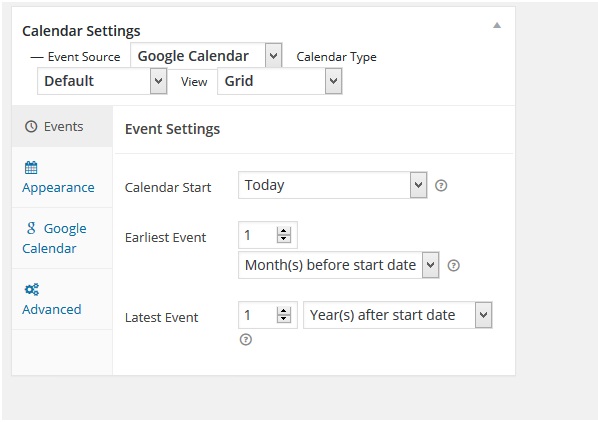
Click The Google Calendar tab, and put your calendar ID here, which you created earlier. The other tabs provide the options to customize your calendar and select how you want your Calendar to look at the website.
After making all the necessary selections and changes, click “Publish” to publish the calendar on the site.
Displaying Google Calendar On The Website
The Google Calendar which you created would not be visible on your site until you add this calendar to a WordPress page or post.
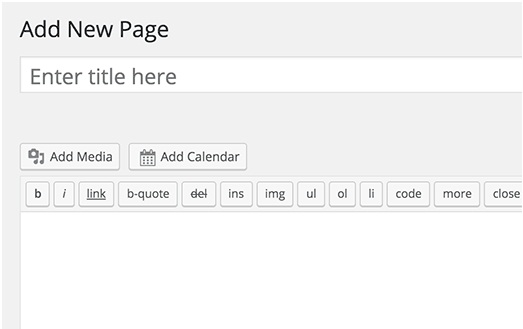
For this, create a new WordPress post or edit an old one. On the editor screen of the post, an “Add Calendar” button would be visible. Clicking this button would enable you to select the calendar which you just added to a drop-down menu.
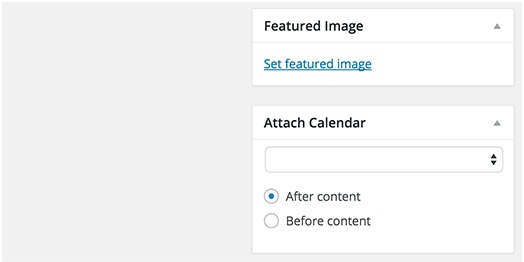
You can also choose to “Attach A Calendar” to a post through the attach calendar Metabox given on the post edit screen.
In order to display your calendar in the sidebar widget, click on “Appearance” and then click the “Widgets” page, to locate the “Calendar Widget”. Once you find this widget, simply drag and drop it to the sidebar.
From the “Widget Settings”, select your calendar from the drop-down menu, and click the on “Save” button before exiting.
Now, when you would visit your website, you would be able to see the calendar, and you take your mouse over the different dates, the ones for which an event is scheduled will display the event details.


