
These days, it has become very difficult for bloggers to attract a high influx of audiences and visitors to their posts, and as a result the bloggers try to enhance their content inn multiple ways so that visitors find it interesting.
One of the best ways to present the content in an engaging and engrossing manner is by presenting it in the tabular form, but, for that you would be required to add a table to the website. In WordPress, there are many ways to add a table to your posts or pages, and one of the most common ways is to manually write the CSS and HTML in your posts. But, not everyone is skilled enough to write HTML codes.
If you don’t possess the CSS knowledge or HTML coding skills, you can still add the tables to your WordPress pages and posts.
How To Add Tables To Your WordPress Posts?
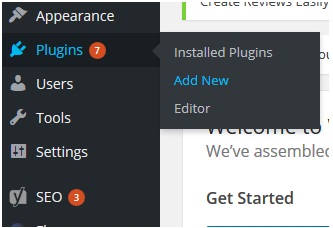
1. Download, install and activate the TablePress plugin. Simply log in to your WordPress’s Admin account, and from the left menu, select “Plugins” and now click on “Add New”.
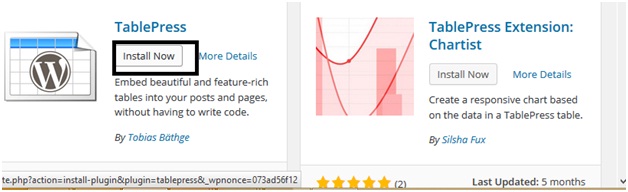
2. In the search box, type the name “TablePress” and press “Enter”. It will show you a list of plugins, and on the top of the list, you can see the “TablePress” plugin. Click Install Now.
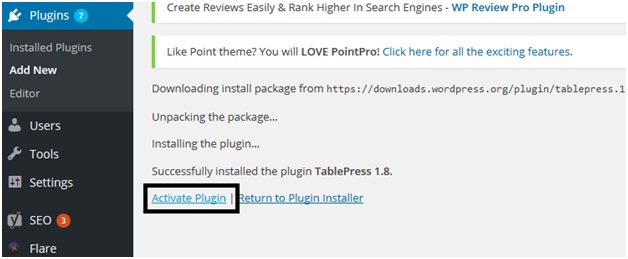
3. Once you have installed the plugin, click on “Activate Now” to initiate the plugin and use it on the site. The plugin can now be accessed from the WordPress menu.
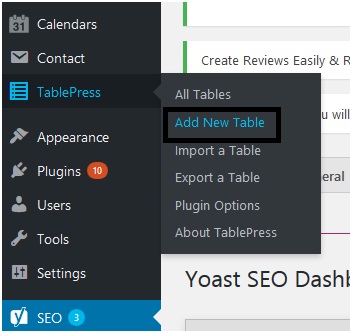
4. To create a new table, click on the “TablePress” from the menu, and then click on “Add New Table”.
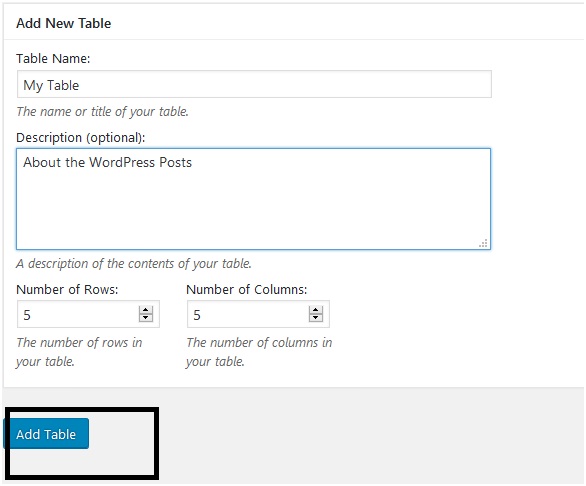
5. Give your table a name and the description, and also select how many columns and rows you want in your table. If you want, the columns and rows can later be edited. Click on “Add Table” to create the table.
 6. Now you will be navigated to the “Edit Table” screen. Here you can the required data to the table, and if needed, you can also add the extra rows and columns. The already added rows and columns can be dragged and rearranged. Now the table is created and it can be added to any post (new or existing ones)
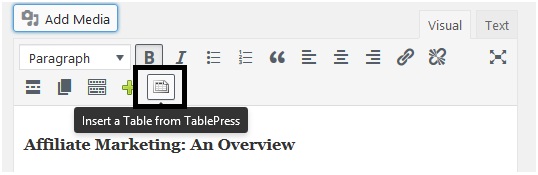
7. To add the table to a post, open a new post or an existing one. If you are using the WordPress’s visual editor, you will notice the “Tables Icon” on the top. If you click this icon, you would be shown all the existing tables.
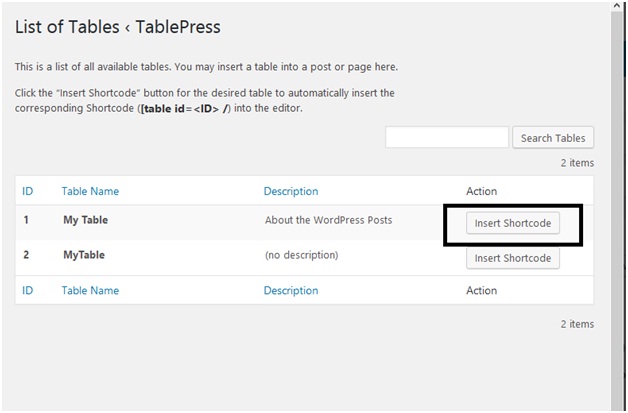
 8. To add any table out of the ones shown here, click “Insert Shortcode” button presented next to the table and this will add the table’s shortcode to your post.
 9. If you don’t use the visual editor for the posts, then you can also insert the shortcode manually. For this, click on the “TablePress” from the left menu, and it will display the list of the tables which you have created.

10. Drag the mouse over the table which you want to insert in your post, and click on the “Show Shortcode”. A pop-up window with the table shortcode.
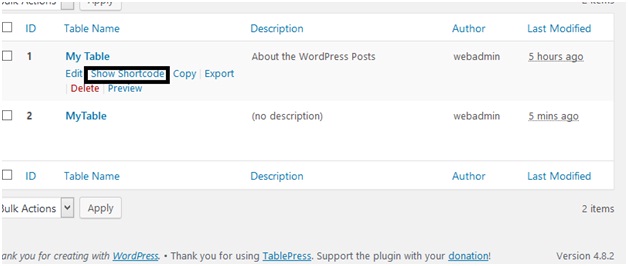
11. Copy the shortcode from here and paste it in the post wherever you want to insert the table into the post.
This is the easiest way to add the tables to your post without writing the HTML or CSS code. However, if you want to customize how the table looks, you would have to customize the CSS of the table and for that, you would require coding knowledge.
Apart from using the “TablePress” plugin, there are many other WordPress Table plugins which can be used to insert the tables. These include “ULTIMATE TABLES WORDPRESS PLUGIN”, “WPData Tables Plugin” etc. These plugins offer easier ways to create and insert tables in the posts.


