WordPress is one of the most feature-rich web development platforms that gives bloggers and website owners flexibility to customize their websites in an easier manner. Even if you are not adept at programming and coding, you can still manage your WordPress website.
Thanks to the various plugins, features, and functionalities, it’s very easy to manage, customize and enhance a WordPress website.
Enhancing Your WordPress Website With A Google Map
Google Maps, which help you find the right way amidst streets and new places can be easily integrated into a WordPress website. These days, most people integrate a Google Map into their website’s “Contact Us” page, which helps the website visitors clearly understand the physical location of the company. The integration of the Google Map not only makes it easier for users to locate the company but also acts as one of the best ways to enhance the user experience on the site.
Once integrated, it can be a little difficult to alter the Google Map location on the website, but, using Power Builder can help you greatly.
The “Power Builder” is a WordPress plugin that enables the users to easily customize their websites while making necessary modifications in its layout. Power Builder presents an array of wonderful options to customize the site, change its layout and to hide/show various different elements on the devices. If you want to change the Google Map location on your website, Power Builder facilitates an easy GUI based method to do it.
All you need to do is download and install the Power Builder on your WordPress website to use it for the different customizations.
Step by Step Guide To Change The Google Map Location
Here’s the step by step guide to change the Google Map location on your website using the Power Builder. Here, we are assuming that you have downloaded, installed and activated the “Power Builder” on your WordPress website.
1. Login to your WordPress account, select “Pages” from the left side menu of the site and open the “Contact Us” page for editing where the Google Map location is already integrated.

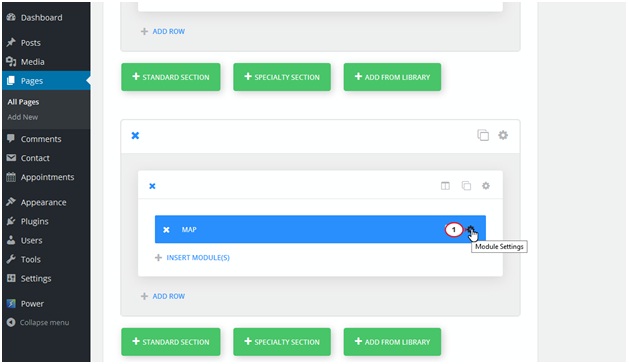
2. Once you click the “Edit” option, you are redirected to the Contact Us’s layout. Here, look for “Map Module”, and then click the “Module Settings”.
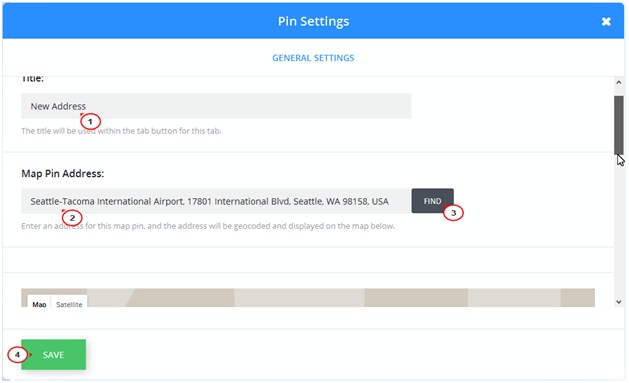
3. Now click “Add New Pin”, and then enter the information like “Pin Title” and the new address under the relevant fields. Now click “Find”, and once the location has been found by the Power Builder, click “Save”.
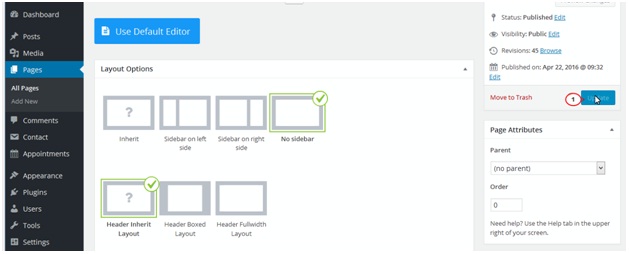
4. After making all the necessary changes, click “Update” to save these changes to your site’s settings.
 5. Open your “Contact Us” page and refresh it to ensure that the changes which have made have come into effect and the Google Maps is now pointing to the new location.