Everyone wants their WordPress site to rank well and receive lots of traffic and that is impossible until one has great search engine rankings. The best way to integrate and boost SEO is to install the all in one SEO pack that works within the WordPress platform to boost your SEO. However, it is simply not enough to know that it is a plug in that one needs to install. This plugin requires a considerable amount of configuration. This is how you go about it.
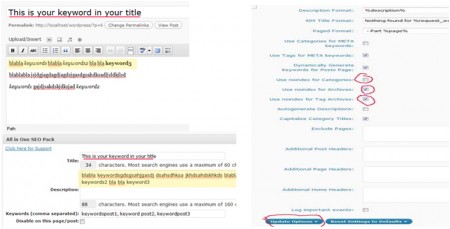
If you’re not using themes that are already SEO enabled so that they don’t need the plug in, the first thing you need to do is to go to the administrator dashboard and click on settings. Once on settings, click on the All in One SEO option and enable the plug in. Once that is done, you need to fill in the descriptions.
Start from the Home title option, which asks the title of your blog and move on to other options like Home description, where you fill in a short description of your website and home keywords, where you type in the desired keywords. Unpick the use no index for categories option and finally, update the page by clicking on the “update options “button.
Once this is done, the process is essentially complete and you can scroll down and find the all-in-one SEO pack at the bottom of your post’s page. To configure the all in one SEO pack, copy and paste the title of your post on the title option, put in keyword rich sentences in the description tab and type in the keywords that are relevant to the particular post and save all the relevant changes. Once you are done with that, you are all set for SEO optimization.


