Though traditional website designers boast of improved functionalities, wordpress effortlessly mocks them by providing its users the same tech only with no coding at all. One such cool functionality is the Voice Search option, which enables the user to just speak the search keyword, and the search form automatically recognizes it and fills it for the user. The addition of voice search can be done in two ways, but for both of them, you will require a WebKit browser, which is quite common these days. This article will explain How to Enable Voice Search on WordPress both with and without the use of plugins.
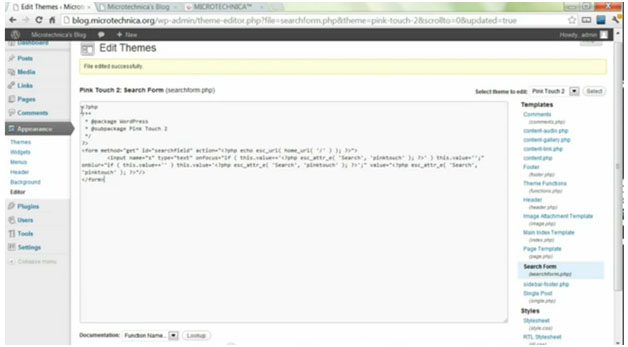
The first thing you would be required to do is to log in to the admin panel and access the dashboard. There on the menu bar click on the appearances tab and click on the Editor Tab. The general coding for the blog should appear and look something similar to shown below.
Click on the search form tab on the right hand side bar, and the coding for all the search forms in your blog will be visible on the editor page as shown in the image. Now all you have to do is add a small piece of code and you’re all done. Just before the final / enter the following code
x-webkit-speech=”true”
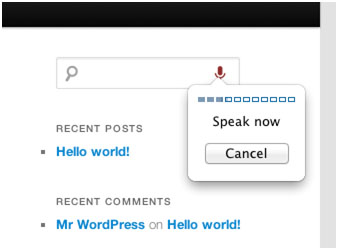
And that’s all there is to it. Now save changes and update the blog and visit it on your browser, you will be able to see a Microphone option added to the end of the search form near the magnifying glass icon. But if you don’t wish to trouble yourself with all the coding or just plainly afraid that you will screw something up, just upload a plugin such as the HTML5 Speech search and it will automatically enable the speech recognition when activated in your wordpress search forms.


