
To create a php website template, what is of utmost importance is that basic knowledge of operating html sources must be known by the user. With this in mind, here’s a step-by-step guide on how to create your website template.
Step 1
Create a folder named php_site and within the folder create two files named index.html and style.css.
Step 2
Within the main folder php_site create two more folders named ‘Includes’ and ‘Variables’.

Step 3
We start filling up the index.html file using an HTML editor. The following instructions have to be entered
<!DOCTYPE html PUBLIC “-//W3C//DTD XHTML 1.0 Strict//EN” “http://www.w3.org/TR/xhtml1/DTD/xhtml1-strict.dtd”>
<html xmlns=”http://www.w3.org/1999/xhtml” xml:lang=”en” lang=”en”>
<head>
<meta http-equiv=”content-type” content=”text/html; charset=utf-8″ />
<meta name=”description” content=”” />
<meta name=”keywords” content=”” />
<meta name=”author” content=”” />
<link rel=”stylesheet” type=”text/css” href=”style.css” media=”screen” />
<title>1stWebDesigner PHP Template</title>
</head>
<body>
<div id=”wrapper”>
<div id=”header”>
</div> <!– end #header –>
<div id=”nav”>
</div> <!– end #nav –>
<div id=”content”>
</div> <!– end #content –>
<div id=”sidebar”>
</div> <!– end #sidebar –>
<div id=”footer”>
</div> <!– end #footer –>
</div> <!– End #wrapper –>
</body>
</html>
Step 4
Next the style.css is opened up and basic styling instruction is to be added to the program as shown in the graphic below.
body {
background-color:#f1f1f1;
font-family: georgia,sans-serif;
color:#333;
margin:0;
padding:0;
}
#wrapper {
width:960px;
background-color:#f8f8f8;
margin:0 auto;
border-left:1px solid #ccc;
border-right:1px solid #ccc;
}
#header {
width:960px;
height:135px;
margin:0 auto;
margin-bottom:25px;
border-bottom:1px solid #ccc;
border-top:1px solid #ccc;
}
#header h2 {
padding:10px;
}
#nav {
width:960px;
height:40px;
border-bottom:1px solid #ccc;
}
#nav a {
display:inline;
padding:10px;
text-decoration:none;
background-color:#f1f1f1;
}
#nav a:hover {
background-color:#bababa;
height:80px;
}
#content {
width:675px;
float:left;
padding:10px;
}
#sidebar {
width:200px;
float:right;
margin-bottom:25px;
}
#sidebar a {
text-decoration:none;
}
#sidebar li {
list-style:none;
}
#footer {
clear:both;
width:960px;
height:135px;
border-top:1px solid #ccc;
}
#footer p {
padding:10px;
}
Step 5
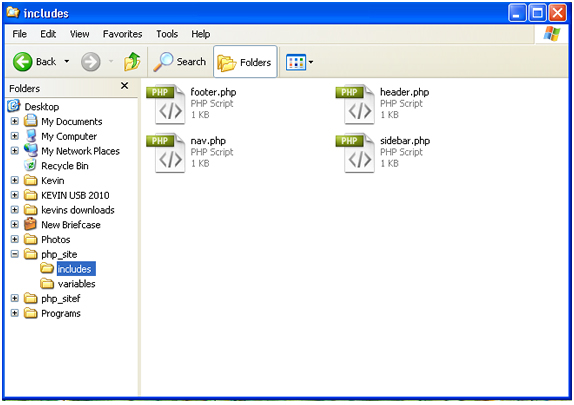
After that is completed files are added within the ‘includes’ and ‘variables’ folders. In the variables folder a file called variable.php is to be created. In the ‘includes’ folder add four files namely, footer.php, header.php, nav.php and sidebar.php.

Step 6
This step includes adding details to the index.html file. An H2 tag is added to the header area, links to the nav area while some text is added to the footer and sidebar area. The graphic below shows the additions made to the original index.html file and how it finally looks
1 <!DOCTYPE html PUBLIC \”-//W3C//DTD XHTML 1.0 Strict//EN\” \”http://www.w3.org/TR/xhtml1/DTD/xhtml1-strict.dtd\”>
2
3 <html xmlns=\”http://www.w3.org/1999/xhtml\” xml:lang=\”en\” lang=\”en\”>
4
5 <head>
6
7 <meta http-equiv=\”content-type\” content=\”text/html; charset=utf-8\” />
8
9 <meta name=\”description\” content=\”\” />
10
11 <meta name=\”keywords\” content=\”\” />
12
13 <meta name=\”author\” content=\”\” />
14
15 <link rel=\”stylesheet\” type=\”text/css\” href=\”style.css\” media=\”screen\” />
16
17 <title>1stWebDesigner PHP Template</title>
18
19 </head>
20
21 <body>
22
23 <div id=\”wrapper\”>
24
25 <div id=\”header\”>
26
27 <h2>1stWebDesigner PHP Template</h2>
28
29 </div> <!– end #header –>
30
31 <div id=\”nav\”>
32
33 <a href=\”#\”>Home</a>
34 <a href=\”#\”>About</a>
35 <a href=\”#\”>Portfolio</a>
36 <a href=\”#\”>Contact</a>
37
38 </div> <!– end #nav –>
39
40 <div id=\”content\”>
41
42 <h1>Heading1</h1>
43 <h2>Heading2</h2>
44 <h3>Heading3</h3>
45 <h4>Heading4</h4>
46 <h5>Heading5</h5>
47
48 <h3>Paragraph Element</h3>
49
50 <p>
51
52 Quisque pellentesque sodales aliquam. Morbi mollis neque eget arcu egestas non ultrices neque volutpat. Nam at nunc lectus, id vulputate purus. In et turpis ac mauris viverra iaculis. Cras sed elit a purus ultrices iaculis eget sit amet dolor. Praesent ac libero dolor, id viverra libero. Mauris aliquam nibh vitae eros sodales fermentum. Fusce cursus est varius ante vehicula eget ultrices felis eleifend. Nunc pharetra rutrum nibh et lobortis. Morbi vitae venenatis velit.
53
54 </p>
55
56 <p>
57
58 Quisque pellentesque sodales aliquam. Morbi mollis neque eget arcu egestas non ultrices neque volutpat. Nam at nunc lectus, id vulputate purus. In et turpis ac mauris viverra iaculis. Cras sed elit a purus ultrices iaculis eget sit amet dolor. Praesent ac libero dolor, id viverra libero. Mauris aliquam nibh vitae eros sodales fermentum. Fusce cursus est varius ante vehicula eget ultrices felis eleifend. Nunc pharetra rutrum nibh et lobortis. Morbi vitae venenatis velit.
59
60 </p>
61
62 <h3>Another Heading Starting Point</h3>
63
64 <p>
65
66 Quisque pellentesque sodales aliquam. Morbi mollis neque eget arcu egestas non ultrices neque volutpat. Nam at nunc lectus, id vulputate purus. In et turpis ac mauris viverra iaculis. Cras sed elit a purus ultrices iaculis eget sit amet dolor. Praesent ac libero dolor, id viverra libero. Mauris aliquam nibh vitae eros sodales fermentum. Fusce cursus est varius ante vehicula eget ultrices felis eleifend. Nunc pharetra rutrum nibh et lobortis. Morbi vitae venenatis velit.
67
68 </p>
69
70 <p>
71
72 Quisque pellentesque sodales aliquam. Morbi mollis neque eget arcu egestas non ultrices neque volutpat. Nam at nunc lectus, id vulputate purus. In et turpis ac mauris viverra iaculis. Cras sed elit a purus ultrices iaculis eget sit amet dolor. Praesent ac libero dolor, id viverra libero. Mauris aliquam nibh vitae eros sodales fermentum. Fusce cursus est varius ante vehicula eget ultrices felis eleifend. Nunc pharetra rutrum nibh et lobortis. Morbi vitae venenatis velit.
73
74 </p>
75
76 </div> <!– end #content –>
77
78 <div id=\”sidebar\”>
79
80 <h3>Navigation</h3>
81 <li><a href=\”#\”>Home</a></li>
82 <li><a href=\”#\”>About Us</a></li>
83 <li><a href=\”#\”>Links</a></li>
84 <li><a href=\”#\”>Portfolio</a></li>
85 <li><a href=\”#\”>Contact</a></li>
86
87 <h3>Box Two</h3>
88 <li><a href=\”#\”>Link Here</a></li>
89 <li><a href=\”#\”>Link Here</a></li>
90 <li><a href=\”#\”>Link Here</a></li>
91 <li><a href=\”#\”>Link Here</a></li>
92 <li><a href=\”#\”>Link Here</a></li>
93
94 <h3>Box Three</h3>
95 <li><a href=\”#\”>Link Here</a></li>
96 <li><a href=\”#\”>Link Here</a></li>
97 <li><a href=\”#\”>Link Here</a></li>
98 <li><a href=\”#\”>Link Here</a></li>
99 <li><a href=\”#\”>Link Here</a></li>
100
101 </div> <!– end #sidebar –>
102
103 <div id=\”footer\”>
104 <p>Copyright © 2010 <ahref=\”http://www.1stwebdesigner.com\”>1stWebDesigner.com PHP Template</a></p>
105 </div> <!– end #footer –>
106
107 </div> <!– End #wrapper –>
108
109 </body>
110
111 </html>
Step 7
This step will convert the html file into a PHP. Selecting specific areas of the html file we will remove them and place them in the respective php files created within the ‘includes’ folder. For example with the header section:
header.php
1 <div id=\”header\”>
2
3 <h2>1stWebDesigner PHP Template</h2>
4
5 </div> <!– end #header –>
Make sure this area has been removed completely from the index.html file and pasted in header.php. In place of the above mentioned graphic in index.html place the following graphic
1<?php include(\’includes/header.php\’); ?>
This has to be repeated with the sidebar, nav and footer sections of the html file.
Step 8
When all of this is done, rename the index.html into index.php and the website template is ready to go.


