With the WordPress platform becoming more and more popular among bloggers, there are some commonly asked queries and doubts which keep cropping up. One of those frequently asked queries among WordPress users is “how do I add a new blog post in WordPress?” Well here’s a step-by-step guide as to how one should go about adding a new post.
Step 1
Use your WordPress username and password to login to your account
Step 2
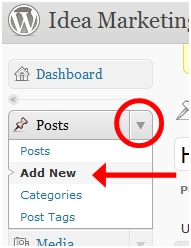
Firstly locate the ‘posts’ menu from the left hand side panel right underneath the ‘dashboard’ button. Click on the down arrow next to the posts menu to open the drop down box. Once that is done, click on “Add New”
Step 3
After clicking on the “Add New” button, a blank writing page will appear with the title “Add New Post” at the top of the page. By clicking on that “Add New Post”, the title of the post can be entered.
The body or the detailed content including text, photos and video clips can be entered into the blank space below the toolbar.
Step 4
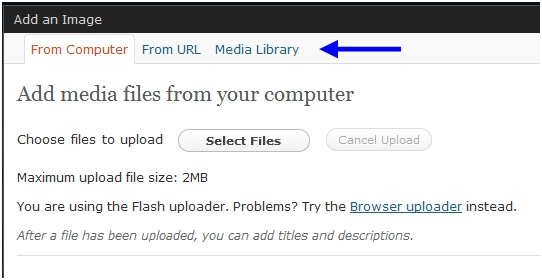
With the basics completed, you are ready to start writing. You can add photos using the rectangular button above the toolbar. A pop up window will appear once you click on the button asking you to browse, select and upload images that you want.
Once all of that is completed, run the spellcheck and complete all editing and related tasks.
Step 5
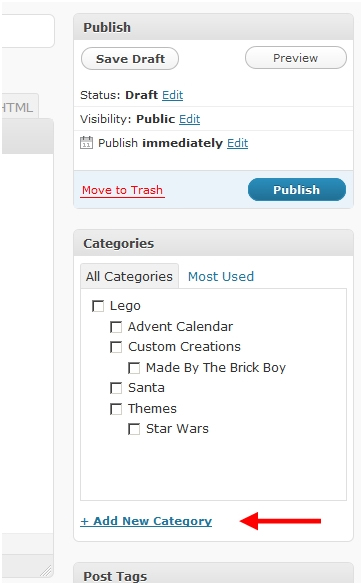
Before finally publishing your work, you might want to categorize it by attaching a tag to it. Just below the Publish menu, on the right sidebar, there is a categories menu where you can choose your category which you have already created. If this happens to be your first post, the post will be automatically classified in the ‘uncategorized’ category.
Step 6
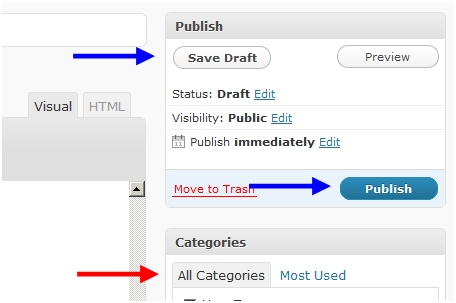
Once all of this is done, turn to the right sidebar and locate the publish menu. There will be two main options, “Save Draft” and “Publish”. Click Publish to complete your work.

