Just as in school students lose out on a few marks despite having written a great essay simply due to bad handwriting, in WordPress one is prone to unknowingly put off a few readers because of having used an unpleasant font. Therefore knowledge of the procedure to change the font of the contents is essential for maintenance of an attractive blog or website.
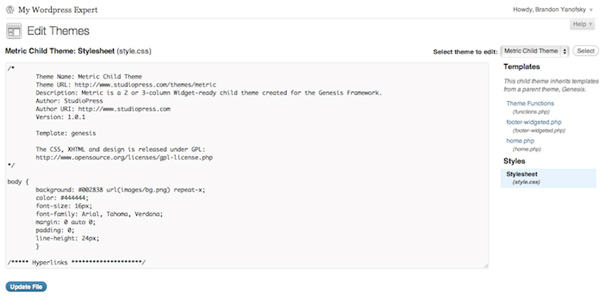
The place you can modify your text’s font type, size, color et cetera from is the ‘Themes’ style sheet (generally accessible through style.css).Different parts of the webpage may have different font settings. For instance, the header may have one set of font customizations while the fonts of the footer, the sidebar and the content area can be configured in other distinct ways. Therefore, to begin with one has to identify the part of the webpage whose font characteristics are required to be changed.
Once that is done, the next step involves tracking the part of the source code which contains the font settings for the concerned part of the webpage. Usually, this can be found in one of the CSS classes. For example, if you need to set the font of the sidebar menu, you’ll have to make changes in the #menu class, as illustrated below:
#menu {font-family: “Times New Roman”, “Arial Black”,
sans-serif; font-size:1em; color:black; }
This would set Times New Roman as the font of the text in the sidebar menu, with the defined font-size and color. However, if Times New Roman is not installed on the user’s machine, the text will be displayed in Arial Black. If this too is not available on the user’s machine, the system font will take over and the default font for sans-serif will be used.
To summarize, the following steps should be followed to modify the font:
- Identification of the target part of the webpage.
- Identification of relevant part of the source code.
- Making due changes in the identified portion of the source code.


