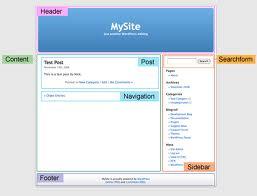
The simplest way to modify your fundamental WordPress theme is by altering the background. The following steps will help you execute this process.
- Upon installation of WordPress, you will find a default template already inserted. To make alterations to it, you first need to log into your WordPress Account. Then, select Presentation and finally Theme Editor. On your right side of the screen, you will notice a directory of files you can edit. Choose Style.css
- On scrolling down, you will find a labeled code. In that code, there will be a line that says Background. This specifies the template color and the background image to be displayed.
- In the code, delete the section of the code starting with URL and substitute the color code with the code of your desired color. Once the modification has been done, select Update File to have a look at your results.
- Suppose you fancy the beautiful backgrounds available on the web. In that case, you need to locate the background you desire and download it. Using an FTP program, transfer the .JPG or .GIF file into the image directory of the theme.
- Once this is done, revert to your WordPress Dashboard; choose Presentation and then Theme Editor. Open up the Style.css file again. Have a look at the line of code in the background and change it to the name of your background image.
Every theme you utilize is going to have a different code but most of them should function pretty similar to the one you just read-especially the ones which are well coded. Once you get accustomed working with the components of the style sheet, it becomes comparatively easier to make the simple changes in customization.


