You can add themes in WordPress by three different ways: By making use of the Administration Panel; by using the Control Panel and Manually.
Using the Administration Panel
- Log into the Administration Panel of WordPress
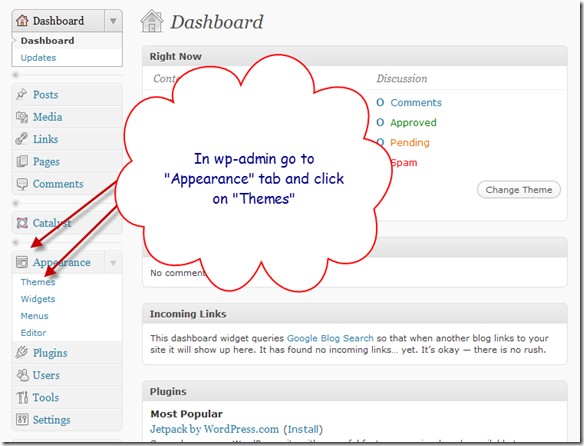
- Go to the Appearance section and then select Themes
- Choose Install Theme
- Look up in the Search Menu or use the Filter Options as an alternate method to find your desired theme
- To preview your link, click on Preview. To upload it in your blog, click on Install
- Select the Upload option from the Sub Menu to transfer a zipped file of a previously downloaded theme on your desktop
Using the Control Panel
- In the File Manager in the Control Panel, steer to the Themes Directory.
- After you have opened the folder containing the themes in the control panel,
- select upload file and upload the Zipped copy of the file you stored in the first step
- When you are done with uploading your Zip File, select the file name in the Control Panel and then on its right side, extract the contents from the file. This is done so that the file is restored. Read the instructions to select your new theme.
Using FTP (manually)
- You need to download the Themes Archive and remove the files contained in it
- Use an FTP or SFTP Client to gain access to the host of the Web Server and create a list to store the theme in wp-content/theme file offered by WordPress.
- Upload the file containing the themes to the new list on the host server
- Read through the instructions to select your new theme.
- Choosing the Theme
- Log into the administration panel of WordPress
- Go to the Appearance section and then choose Themes.
- In the list of available themes, click on your desired choice
- A Sample of the theme will be displayed.
- To activate your choice, select Activate Theme to the right in the topmost corner of the page.


