It has often been seen that one of the doubts faced by WordPress users is that they have difficulty uploading a plugin to assist them in writing their blog. The issue of uploading a plugin comes into play only when the plugin in question is not available in the WordPress directory or is a paid plugin. So here is a step by step tutorial on how to get the job done in such cases.
Step 1
The plugin in question has to be downloaded from the source. It has to be in the form of a zip file. Once that is done, on the WordPress Admin panel, go to the Plugin section. Press on the ‘Add New’ button.
Then press the upload button as shown in the above image.
Step 2
Use the browse option to locate the plugin which you have just downloaded on the computer. Once that is done press ‘install now’.
Step 3
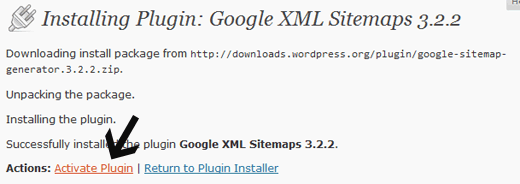
Once the installation is complete you will be taken to the plugin activation page. Configure the settings as per your needs. Once that is done, press ‘Activate Plugin’.
Once the activation is done, the process will be considered complete.
For more advanced users of the internet the FTP model of uploading a plugin can be used. Firstly FTP software like FileZilla must be in use in your computer in which the plugins must be dropped or uploaded. The upload must take place with the individual files unzipped from the zip file, as shown below.
Once they have been uploaded you need to go to the plugins panel on WordPress Admin panel. The plugin which you have just uploaded will be there for you to view. Click on activate and the job is done.


