Google Analytics is an important part of the WordPress game for most site owners. This tutorial takes you through the simple steps you need to take in order to add Google Analytics to WordPress. It all begins with an installation of the Google Analytics Plugin.
Once you download this plugin, you’ve got to unzip the package and upload the contents to the folder with the /wp-content/plugins/ address. Next, go to the Dashboard of your WordPress site and choose the Plugins option.
You will be displayed a list of plugins, both active and inactive. Scroll to the Google Analytics plugin and you will see a success message being flashed.
Then, open a different tab in the browser and log in to your Google Analytics at the google.com/analytics/ URL. The main setting page of the website loads. Add a website profile by choosing the Add Website Profile option.
Pick the Add a Profile option if you are working with a new domain. Input the URL of your website. Then, you are asked to specify your country and the time zone.
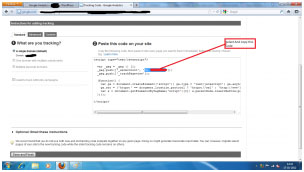
Press Finish when all this is done. You are then provided with an HTML code that can be added to your website. This is actually the Google Analytics code.
Now, come back to the Dashboard and go to Options > Google Analytics. You see a text field in the options screen. Paste the HTML code discussed above here and click on Update. In these few simple and easy to follow steps, you add the powerful Google Analytics functionality to your WordPress website. You can always check if you have added the
Google Analytics code correctly by revisiting Google Analytic. Your blog URL will be accompanied by a Receiving Data text, indicating that your procedures were successful.


