Slideshows are a cool way to order your images and present them in an innovative way. Whether it’s you holiday vacation or a really scene in picture, you can always be assured of popularity if you decide to deliver your message through slideshows. So why not use them in your WordPress blog? To include slideshows into your posts, you don’t actually need any special plugins or widgets.
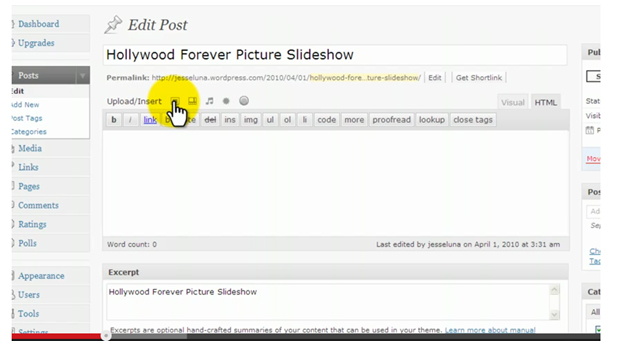
You can just structure your images to be presented as a slideshow while inserting new post. So here’s how you do it. First go to the post menu on the admin panel and click on the add new post tab. This will take you to the page where you can add new posts. Now once you’re done writing the post, look at the top left corner of the screen, where there will be a small icon using which you can add pictures in to your post. Now click on it and a new dialog box will open asking you what images to add.
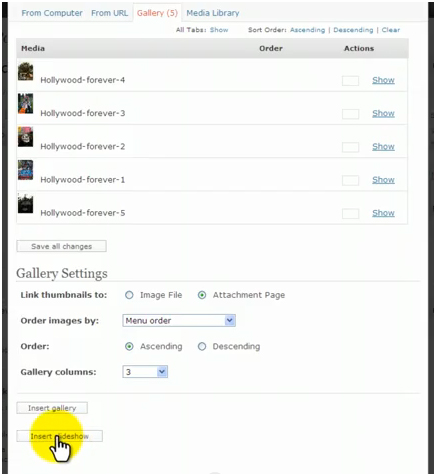
Now on the new dialog box, you can see three tabs on the top, providing you option to upload files. You can either choose to upload photos directly from your computer if you have the pictures stored in the hard disk. You can choose to insert pictures from a media library, in case the pictures are already in your blog or you can directly enter the URL of the image into the page.
Now, once you have decided where to import the pictures from, select all of them and click open. All the selected images will be uploaded. Finally click on the save all changes option at the bottom. Now a new tab called display will appear on the top, click on it and click the insert slideshow button at the bottom. And there you have it, your very own slideshow of the selected images on your post.


