WordPress is now one of the most sought after Content Management Systems. The ‘Advanced Custom Fields’ gives access to special fields like relationships, uploading of file, date picker etc. Advanced Custom Fields Plugin is relatively convenient to use and you can use it for editing, creating, reordering and also fully customizing the edit screens.
New fields can be created and the default fields of WordPress can be hidden. The following tutorial gives you some details. You’ll be able to manage your way after going through this tutorial.
For installing this feature, you have to first download the advanced custom fields plugin. Next you have to upload the advanced custom fields to the directory ‘/wp-content/plugins/’. The plugin can be activated via the ‘Plugins’ menu which is in WordPress. You will be asked to opt for Upgrade in Database. Now a backup should be done to the database and Upgrade option should be clicked.
Usage of the plugin
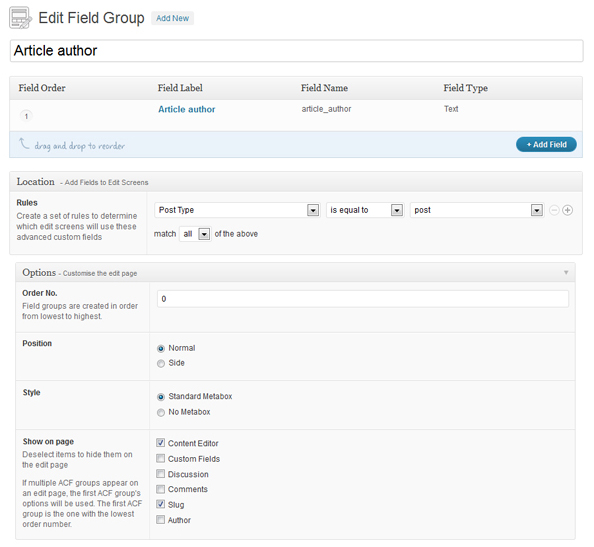
After the uploading and activation of the plugin, check for Settings and opt for the Advanced Custom Fields link and go for “add new”. You have the option to specify a name to the group of fields and keep on adding several custom fields. The important supported types include:
- Date Picker
- Radio Button
- Checkbox
- Image
- File
- Page Link
- Relationship
This interface can be explored and various groups of custom fields can be added and you can allocate them as per your wish. You have the option to choose the Posts or pages, or custom post type you would like to have with the new custom fields set. You may have all posts, pages or one page.


