Most blog posts nowadays carry thumbnails and it is very rare to find a user who doesn’t use thumbnails to make his/her website more easily navigable and user friendly. However, a majority uses one of the many thumbnail plugins that are available on the web. There are many reasons why those are undesirable, mainly due to the fact that they can not only snatch a link from the blog but also slow down the blog considerably. Hence it is much wiser to simply add post thumbnail support for the concerned WordPress theme.
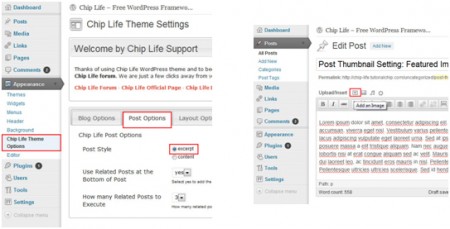
After one has added a new post with a considerable amount of data on it, one needs to set the post title and content. After that, one needs to upload the image or images related to the post, using the upload/insert option which allows the user to add images.
The concerned images can be added from the computer at the user’s discretion. Once the user has selected the image, the next step is image settings, where the user needs to set the image title, caption, alignment, size of the image for the post concerned. If the user wants the image to be a part of the post, he or she should press the insert into post option, otherwise, simply skip that option and save the changes.
For post thumbnails, the post style should be set to “excerpt”, for a majority of themes. This can be done from the post options which are listed under the theme options for every relevant theme. The desired thumbnail settings, which are also very important, can also be set using the layout options and selecting the featured image which is the thumbnail and going ahead with the modifications. The only thing left to do then is to simply publish the post.


